


Learn the essential techniques to make precise cutouts and remove backgrounds with ease. Discover the step-by-step process for how to deep etching in Photoshop using selection tools, layer masks, and more. Improve your skills and create professional-looking images with these 7 helpful tips.
How to Deep Etch in Photoshop ( tutorial )
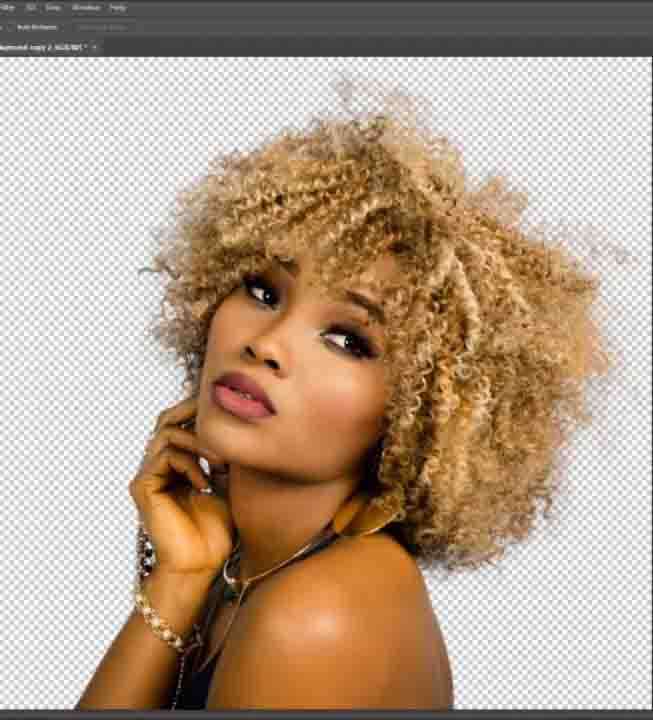
If you’re looking to remove the background from an image, deep etching in Photoshop is a powerful technique that can help you achieve stunning results. Deep etching allows you to isolate an object from its background and make it transparent, which can be useful for a wide range of applications, from graphic design to product photography.
In this tutorial will help, we’ll walk you through the steps to deep etch in Photoshop, starting with the basics and progressing to more advanced techniques.
Step 1: Open your image in Photoshop
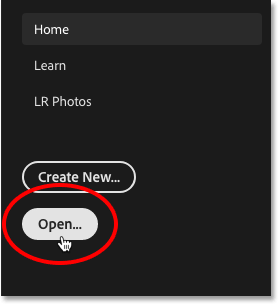
First, open the image you want to deep etch in Photoshop. To do this, go to File > Open and select your image file.
Step 2: Select the Pen tool
The Pen tool is the primary tool used for deep etching in Photoshop. To select it, simply click on the Pen tool icon in the toolbar on the left-hand side of the screen.
Step 3: Create a clipping path around the object
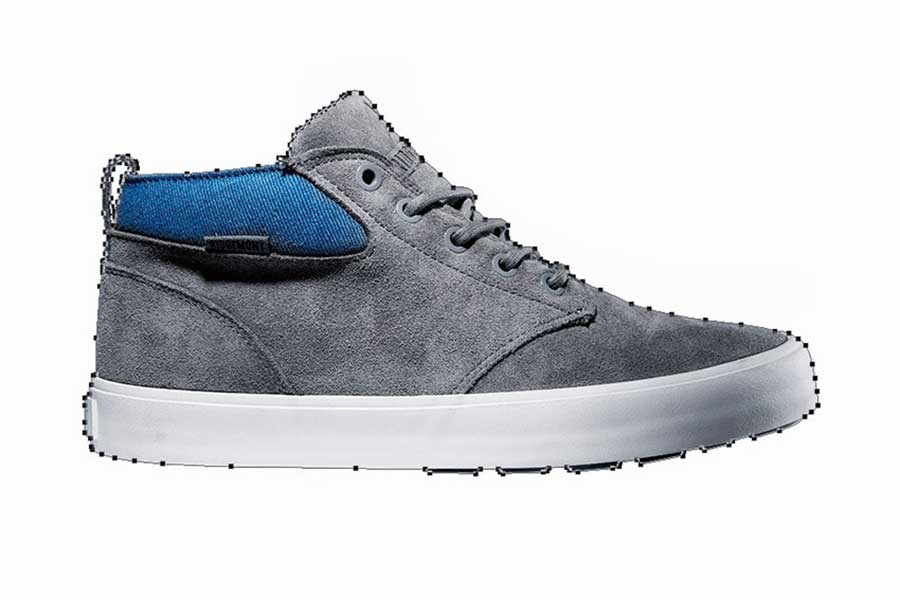
Using the Pen tool, create a path around the object you want to isolate from the background. Be sure to click and drag to create curved lines as necessary, and use the Alt key to adjust your anchor points.
Step 4: Make a selection
Once you’ve created a path around your object, right-click and select Make Selection. This will create a selection around the object, which you can then use to remove the background.
Step 5: Refine your selection
Depending on the complexity of the object and the background, you may need to refine your selection to ensure that it’s as accurate as possible. To do this, go to Select > Refine Edge and use the tools in the Refine Edge dialog box to adjust your selection.
Step 6: Remove the background
With your selection in place, you can now remove the background. To do this, go to Edit > Cut or simply press the Delete key on your keyboard. This will remove the background from your image, leaving you with a transparent background.
Step 7: Save your image
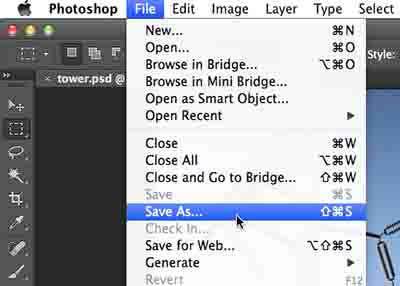
Finally, save your image as a PNG file to preserve the transparency. To do this, go to File > Save As and select PNG from the drop down menu.
Image Deep Etching Vs Image Masking Service
When it comes to separating an object from its background in an image, there are two popular techniques – Image Deep Etching and Image Masking Service. Both techniques have their own advantages and disadvantages, and it’s important to choose the right one depending on the requirements of the project.
Image Deep Etching is a technique used to remove the background of an image, leaving the object on a transparent background. It’s a precise technique that works well for images with hard edges and clear boundaries. On the other hand, Image Masking Service is used for images that have complex edges, such as hair or fur. It technique involves creating a mask around the object, which allows it to be separated from the background.
In terms of cost, Image Deep Etching is usually less expensive than photoshop masking service. However, Photo Masking Service provides more accurate results for images with complex edges. Therefore, it’s important to choose the right technique based on the project’s requirements.
How To Use Pen Tool & Clipping Path in Adobe Photoshop
When it comes to creating precise and clean selections in Adobe Photoshop, the Pen Tool and Clipping Path are indispensable tools. The Pen Tool is particularly useful for drawing vector shapes and paths, while the Clipping Path is a method of masking an image to isolate it from its background.
To use the photoshop pen tool, select it from the toolbar and begin by clicking to create anchor points around the object you want to select. Use the handles to adjust the curves of the path, and finish by closing the path with a final anchor point. To create a deep etching or Clipping Path service, select the desired layer and choose “Clipping Path” from the Layers palette. Set the Path to “Clipping Path” and adjust the settings as needed.
When using these tools, it’s important to have a steady hand and to take your time to ensure accuracy. With practice, you’ll be able to create professional-looking selections and masks in no time.
Who Needs Best Photoshop Deep Etch Service
Photoshop deep etching is an essential photo editing service technique for many businesses and individuals who want to remove the background from an image. Deep etching is a process of cutting out an object from its original background, which can be done with the help of the pen tool in Adobe Photoshop.
Many people may wonder who needs the best Photoshop deep etch service, and the answer is simple: anyone who wants to improve their images’ quality and appearance. Deep etching can be useful for a variety of reasons, including:
E-commerce businesses
Online retailers need to showcase their products in the best possible way to attract customers. Deep etching can help remove distractions from the original image background, allowing the product to stand out and be the center of attention.
Advertising agencies
Advertising agencies often use images for their campaigns. By using deep etching process, they can remove the background and create a more polished look for their ads.
Photographers
Photographers often need to edit their photos and deep etching is an essential tool in their arsenal. It allows them to isolate the subject and create a more visually appealing image.
Graphic designers
Graphic designers use images in their designs, and deep etching allows them to create clean and professional-looking designs.
How to use a clipping mask for deep etching?
To use a clipping mask for deep etching, follow these steps:
- Open the image you want to edit in Photoshop.
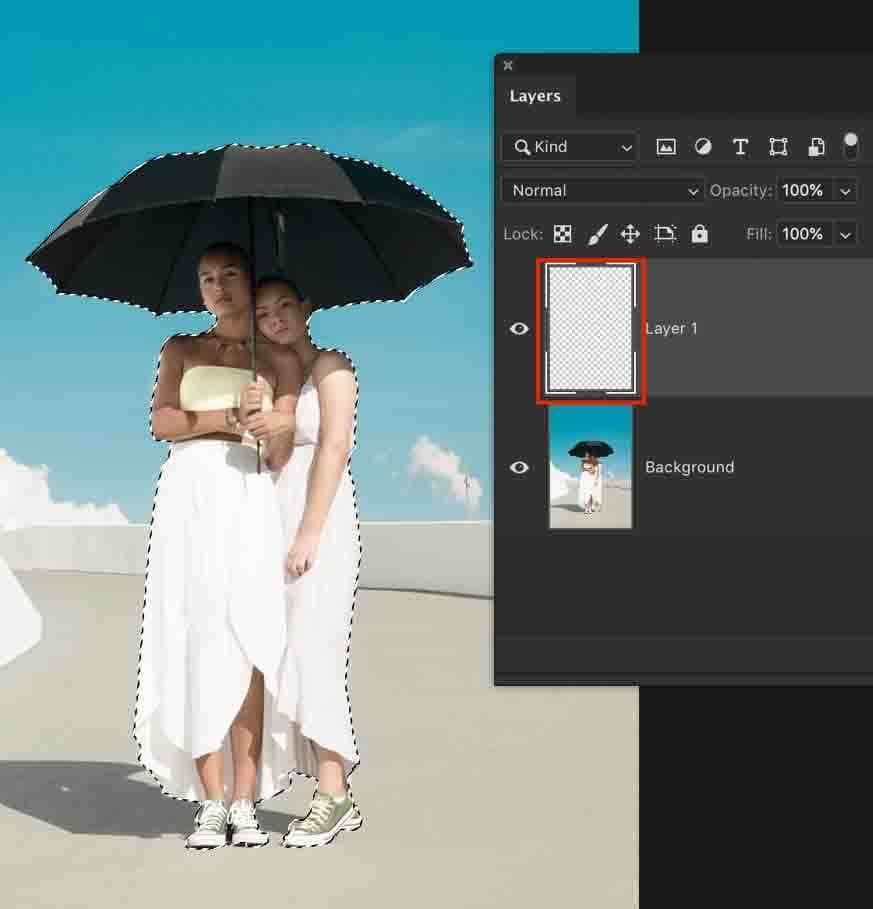
- Create a new layer and place it beneath the image layer.
- Use the selection tool of your choice to make a selection around the subject.
- Click on the “Add Layer Mask” button at the bottom of the Layers panel.
- Click on the layer mask thumbnail to select it.
- Hold down the Alt/Option key and click on the layer mask thumbnail again. This will bring up the Properties panel for the mask.
- In the Properties panel, click on the “Invert” button to invert the mask.
- With the layer mask still selected, paint over any areas that you want to keep with a white brush.
- Paint over any areas that you want to remove with a black brush.
- Once you’re satisfied with the selection, you can delete the original background layer or hide it.
Benefits of Image Deep Etching Service
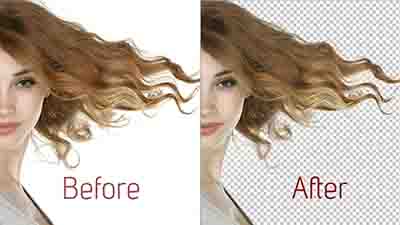
Image deep etching is the process of removing the background from an image, leaving only the subject in the foreground. This can be a time-consuming task, especially if you have a large number of images that need to be edited. However, the benefits of using an image deep etching service are numerous.
1. Improved image quality
Image deep etching can help to improve the quality of your images by removing distracting backgrounds and focusing the viewer’s attention on the subject. This can make your images look more professional and engaging, which can help to attract more customers.
2. More versatile images
By removing the white background from an image, you can use the subject in a variety of contexts without it looking out of place. This can help to save time and money, as you won’t need to commission new images for every project.
3. Consistent branding
Using an image deep etching service can help to ensure that all of your images are presented in a consistent manner, which can help to strengthen your brand identity. This is particularly important if you have multiple people working on your marketing materials.
4. Faster turnaround times
Editing images can be a time-consuming task, particularly if you have a large number of them. By outsourcing this task to an image deep etching service, you can free up time to focus on other aspects of your business.
5. Cost-effective
Using an image deep etching service can be a cost-effective solution for businesses that need to edit large numbers of images. Instead of hiring a full-time employee to do this work, you can outsource it to a service provider and only pay for the work that is done.
Final Words
Deep etching in Photoshop can be a useful skill for removing a subject from its background and placing it on a new one. To get started, you need to select the subject and create a layer mask. Then, you can refine the eraser by using the brush tool or the refine edge tool.
When deep etching, it’s important to take your time and be precise. Use the zoom tool to get a closer look and make sure you’re not leaving any stray pixels behind. You can also use the clone stamp tool to remove any imperfections.
After you’re done with deep etching, save your image as a transparent PNG to preserve the transparency of the background.
In conclusion, deep etching can be a useful technique in Photoshop, but it requires patience and attention to detail. Take your time and use the right tools to get the best results. Happy editing!
Our Latest Blogs
20+ Best 3 Point Slinger for Camera📷 in 2023
Artistic Yoga Photography | Yoga Photography Tips 2023
110+ Most Ugly Jewelry 💍 Images in The World
100+ Most Ugly Shoes 👠 Ultimate Guide In 2023
Top 60+ Ugly Rings💍 In 2023 : From Weird to Wonderful💛
FAQ’s
What Does Deep Etching Mean?
Deep etching is a digital image editing technique used to isolate an object from its background. It involves removing the background or unwanted areas of an image using specialized software tools. This process can be used to create a transparent or white background, making the object stand out more clearly.
How do you deep etch an image?
Deep etching is a technique used to isolate an object from its background in an image. It’s a commonly used method in graphic design, and can be done using various software. Here’s a step-by-step guide on how to deep etch an image in a few simple steps.