


How to make the background white in Photoshop CS6
How to Make The Background White in Photoshop CS6: Someone who is completely new to Photoshop asked us how to change the background color from white to another. We collected this lesson step by step. We hope that beginners will follow this.
Did you take a photo that you think is best for a white background, but thought it was a later production? It happens to all of us, but it can be solved by learning how to create a white background in Photoshop.
A pure white background may not seem important at first, but it can be important for wedding photos, website images and corporate photos. Too many websites display images with plain white borders. It’s easy to decorate the white background of your project!
How to Remove White Background in Photoshop
Some important thing –
- Remove White Background on Photoshop
- Use Transparent Image
- Cutout & Remove Background
- Make Transparent Background Photoshop
- Refine Edge on Photoshop
Do you have a photo whose background color you don’t like? We will show you step by step how to Remove White background color in Photoshop.

It takes some patience, but it’s very easy to do. So let’s get started!
Step 01: Choose Your Image/ Photo
The quality of the finished photo depends on the time spent on the process.
When you first change the background color in Photoshop, choose an image with sharp edges and a clean background. Easier to use than more complex compositions.
Here are some things to keep in mind if you do not split the theme to change the background color:
- Hair loose, wrap, prick or flattened;
- Articles are too low;
- Everything has a smooth surface;
- The background mixes with the theme.
Step 02: Open your Image on Photoshop
Before working with backgrounds and cleaning up, open the image in Photoshop first. Right-click on the image and select Open … and select Photoshop. Your image will open in a new Photoshop window on your screen.
We need to make a copy of the original image layer before making any changes. You can make changes to the original image layer, but then you run the risk of permanently modifying the image file. It is a good practice to modify the two layers so that the original layer is preserved.
To repeat an image layer, select Layer >> New >> Layer from the top menu bar and create a new layer.
Or Click the first row in the Layers panel at the bottom of the screen and drag it to the New Layer button. This button looks like a rectangle under the bottom line of the panel.
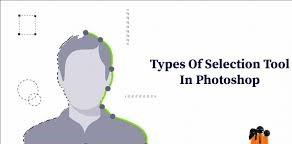
Step 03: Make Selection your image on Photoshop
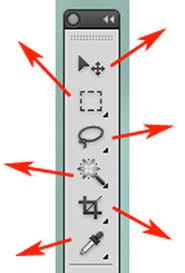
Choose a quick selection tool. This is on the left side of the screen.
Use it to record the content of your topic.
Photoshop takes some time to see the choice. It depends on the image size and the speed of the computer. Be patient. Draw a little and wait until you see the results.
It may take a little practice. The automatically selected area appears during drawing.
You will see a section of the selected object containing the same color, tone, or texture.
That’s why it’s important to choose a photo in which the subject does not fit in the background.
Lots of tutorials on how to create a pure white background using pictures with very clean and clear objects.
I deliberately chose a photo that was not that simple. This will show some of the challenges that create a blank white background. And how to deal with it.
As you continue to draw, the Background tab will also appear selected. Once you’ve selected your object, you can select the refining brush on the left side of the screen. You can then paint over these parts until they show the mask again.
Zoom in on the bottom of the topic. You see, it’s a little blurry and inseparable.Explore all the ends of the topic with Refine Edges to make it clearer.
You can adjust the properties of the brush with the right mouse button or in the menu in the upper left corner of the screen.
Step 04: Add white Background
After removing your backing, you can add white to your theme. Start >> Start >> Target >> Choose an invitation and create a new cover. Choose white and paint the white suit with web tools.
Place these white curtains on a window with a distracting image on the panel to whiten your head in the background.
Step 05: Refine the Edge on Photoshop
The selected option is incorrect, especially if your vision is blurred. If your text is limited, well-defined, you can skip this process. To use the selected photo, you must view and clear it.
How to Make The Background White in Photoshop CS6 : From the drop-down menu, select Matte Sprays. Select the number of pixels. 10 I will take this photo. This will vary depending on the size of the bank in the picture and the amount of your medicine. Blow it in the corners of the cleaner part so most of you aren’t all clean.
You can also select a matte finish and remove the white matte finish. Do this if the definition is not effective enough.
- There are several variables that affect the type and type of edge cleaning required. Some of them are:
- The difference between the object and the actual background
- Whether the edges of the object are smooth or blurry.
If the edges are sharp.
- Is the background and background of the object the same?
How to clear the bottom.
- Try different settings to see which options work best for you.
Why Need Pure White Background on Image
There are many reasons why photographers need to change the background of an object in white space. For example, you may need to:
- Eliminate distractions: A white background can focus more on your topic and help users better.
- Solve color problems. A negative color can then clean the product and reduce the effect of the image.
- Prepare photos for business use: Photos with a white background can be used for various business purposes, whether online, print or other advertising.
QUICK TIP ON HOW TO ADD WHITE BACKGROUND IN PHOTOSHOP
There is a way to check if the background is really pure white. Finally, you want to make sure that your efforts have yielded the correct results. To do so, follow these steps:
- Click the Create New Fill icon at the bottom of the Layers panel (you can also click the Adjust Layers icon).
- Select “Threshold”.
- Drag the histogram slider (located under the Properties tab) to the right. This way, you can make sure that the background remains pure white.
- If the background turns black, you know it’s not pure white.
You can also check if the histogram has a sidebar. This tip is on the right bank. If the right border is not solid, the background of the image is not pure white.
Step 06: Save Image on Photoshop
As with all post-wedding workflow processes, make sure to save it after you edit your image. This includes using the naming conventions to save it in Photoshop and then export it to the host / save image option. This is an important step to ensure that your workflow stays organized and that you can easily find your image when you need it.
After learning how to add a white background to Photoshop, you can create the images you want and deliver it to your wedding clients. While some parts of this process can be exhausting, it gets easier the more you practice. Photoshop can help you make some of the edits you want to your wedding photos, even after the photos have been corrected by an expert.
Remove White Background Photoshop 2023
How to Make The Background White in Photoshop CS6 : From time immemorial, Adobe has transformed Photoshop into an energy management for post processing and eclipse. One thing he is well aware of is the ability to easily delete the background of any photo. Well, with Photoshop 2023, a blank background button will make it easier for you, but is it better than that?
In the new Photoshop 2023 if you open the open layer (the blocked background layer does not allow this), you can now delete the wallpaper by clicking the button. You can see this wonderful little button in the Properties palette. With one click and flicker time, your wallpaper will disappear in an amazing way.
At first glance, this new look is great! Sounds like magic. But if you look closely, you will notice that the hair is stiff.
Of course, very successful in cosmetics, doing piercings like men’s or women’s hair is very good for women. You cannot contextualize your topic to see the design to remove errors and important features.
Read More As Like –
How To Get Refine Edge In Photoshop CC
How To Start And Operate A Digital Portrait Photography Studio
Remove Background in Photoshop CS6 [Remove Background Service]
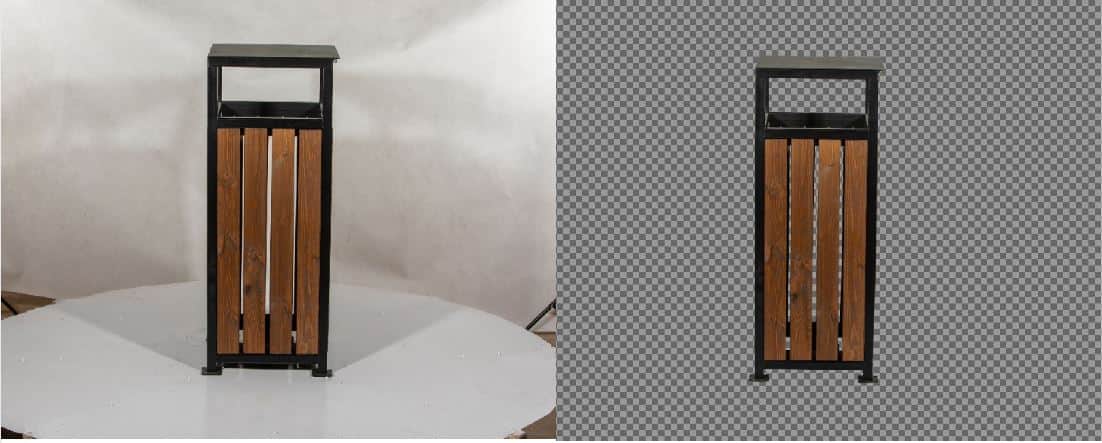
Remove Background in Photoshop CS6: Adobe Photoshop CS6 is a powerful software tool widely used by photographers, designers and digital artists. With its advanced features and user-friendly interface, it offers various techniques to enhance and manipulate images. One of the most common tasks performed in Photoshop is removing the background from an image. It allows you to isolate your content and place it in a different context or use it in various creative projects.
A background removal service is a service that removes the background from an image, leaving only the subject. This service is often used by companies and individuals who need to remove backgrounds from product photos for e-commerce websites or for personal use such as creating photo collages. This service is usually provided by a professional photo editor who uses special software such as Photoshop to remove the background. Some background removal services also provide additional editing services such as color correction, retouching and resizing. The service can be provided online and edited images can be sent via email or file sharing services.
Understanding the Background Removal Service Process
Before we begin, let’s understand the background removal service process in Photoshop CS6. Basically, it involves using different tools and techniques to select and remove the background while preserving the subject. Photoshop CS6 offers several tools for this, including the Background Eraser, the Magic Wand, and the Shortcut. In this article, we will focus on the Background Removal tool as it gives you good control over the background removal process.
Method 1: Using the Magic Wand Tool
The Magic Wand Tool is a popular choice for beginners due to its simplicity. It selects pixels based on their similarity in color and tone. By adjusting the tolerance level, you can control the range of selected pixels and refine the selection.
To use the Magic Wand Tool:
- Open your image in Photoshop CS6.
- Select the Magic Wand Tool from the toolbar.
- Click on the background area you want to remove.
- Adjust the tolerance level to fine-tune the selection.
- Press the “Delete” key to remove the selected background.
Method 2: Utilizing the Pen Tool
The Pen Tool offers more precision and control over your selections. It involves creating paths around the subject manually. While it requires a bit more time and practice, the Pen Tool is highly effective for complex or detailed images.
To use the Pen Tool:
- Open your image in Photoshop CS6.
- Select the Pen Tool from the toolbar.
- Begin drawing a path around the subject, following its contours.
- Close the path to create a selection.
- Right-click inside the selection and choose “Make Selection.”
- Press the “Delete” key to remove the background.
Method 3: Employing the Background Eraser Tool
The Background Eraser Tool allows you to erase the background while preserving the edges of the subject. It automatically detects edges and adjusts the brush size based on the color and contrast differences between the foreground and background.
To use the Background Eraser Tool:
- Open your image in Photoshop CS6.
- Select the Background Eraser Tool from the toolbar.
- Adjust the brush size and hardness as needed.
- Click and drag over the background area you want to remove.
- The tool will erase the background while maintaining the subject’s edges.
Method 4: Leveraging the Quick Selection Tool
The Quick Selection Tool is a versatile option that automatically detects and selects areas based on similar tones and textures. It’s particularly useful when dealing with subjects that have well-defined edges.
To use the Quick Selection Tool:
- Open your image in Photoshop CS6.
- Select the Quick Selection Tool from the toolbar.
- Click and drag over the subject to select it.
- Refine the selection using the “Add to Selection” and “Subtract from Selection” options.
- Press the “Delete” key to remove the background.