


How to Remove an Object in Photoshop CS6
How to Remove an Object in Photoshop CS6: Photoshop gives you more retouching options than Light room because it is a pixel editor. This means that you can manipulate individual pixels in your image file to organize your images. Allows you to make complex adjustments, such as removing mirrors and other unwanted elements in your photo.
Now I’m going to show you how to remove anything Object from a photo in Photoshop.
We are using 3 different techniques –
- The first two techniques will help you with basic object removals.
- The third technique, we’re really going to get our hands dirty and tackle a complicated task.
Let’s Started.
Open Your Photoshop for Removing Element Photoshop CS6
First time open you’re Photoshop cs6 and Select your Image for removing element .Then open it here-
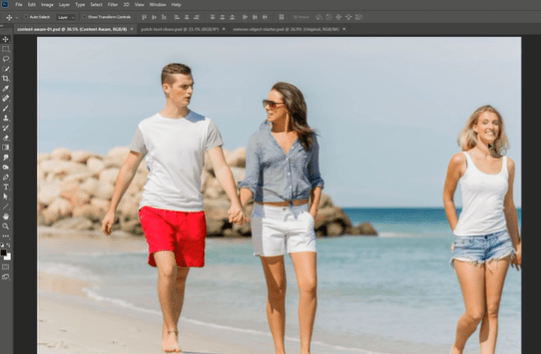
We have a couple walking on the beach, and we have a photo background.if we wanted to remove the photo background from the image, we could do so very, very easily.
First, duplicate the layer to work nondestructively. You can press Ctrl J, Command J on the Mac, we can call that layer, “Edit.“
Use Lasso Tools for Erasing Objects in Photoshop CS6
Then you can select the Lasso Tool, and with the Lasso Tool, we can just simply freehand a selection.So, we’re going to freehand a selection around and erasing objects the photo background in photoshop, and it doesn’t have to be very precise, as long as you go around her.
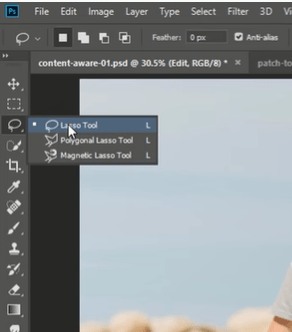
But, having said that, try to keep as much of the original background as you can. So, you can hold Alt, Option on the Mac, and click-and-drag to subtract from the selection. by the way, if you hold Shift, you add to the selection. And once again, Alt, Option on the Mac, and click-and-drag.
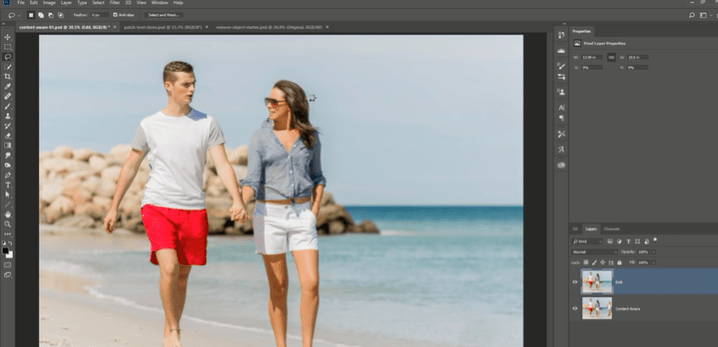
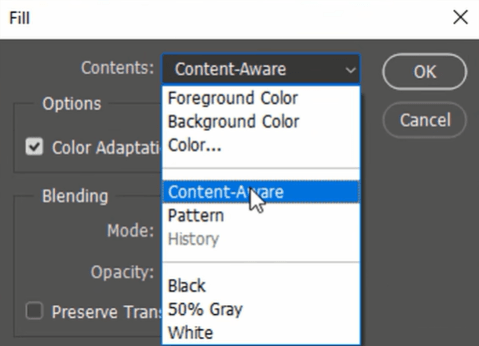
You subtract from a selection. With a selection active, you can go into Edit,Fill. We’re going to select Content-Aware from the dropdown, and make sure that you have Color Adaptation checked, and press OK.
Then I’m going to press Ctrl D, Command D to deselect. And notice that almost like magic, Photoshop removes The Photo.The way that the Content-Aware technology works is by analyzing the pixels that are surrounding the selection, it uses that information to generate the pixels that are going to go inside of that selection.
Photoshop does a great job in guessing what would be behind this person. This technique works best with a simple background, like the one we have in this example. So that’s before, and after.
Content Aware Fill
Fill in the blanks is a must have, for any Affiliate, promoting any program. It works by analyzing the inside of your image to provide a set of tools or content that you want to modify. Delete unnecessary items or move them to another part of the image.
If you want to use internal padding, you will need to translate the layer for information on the image. It is also important to work in a non-destructive manner so that you can eliminate any defects or side effects and start over.
So, for the next example, we’re going to use this image here of Venice, and I’m going to zoom in. What we want to do is remove this group of people that are sitting here.So, what I could do is I could try to do what I just did, use a Content-Aware Fill. But as you will see, it won’t give us the results that we’re looking for.
So, let me just make a really quick selection, and go into edit, fill, Content-Aware, and Notice that Photoshop didn’t do that good of a job this time.It included elements that I do not want to have in the photo.So I’m going to press Ctrl Alt Z, Command Alt Z on the Mac to undo.Actually, to work nondestructively, I’m going to duplicate this layer.I’m going to press Ctrl J, Command J on the Mac, and we’re going to use a different tool.
Use Patch Tool on Photoshop Editing Tips
Select the Patch Tool for How to Remove an Object in Photoshop CS6. Then I’m going to click-and-drag and make a selection around the pixels that I want to replace. With the selection active, I’m going to zoom out and look for an area to sample from. So, it looks like this area is very similar to the area where they’re sitting on, I’m going to click and drag over to that side. You can see the preview inside of the selection, and I can try to match it as best as I can.
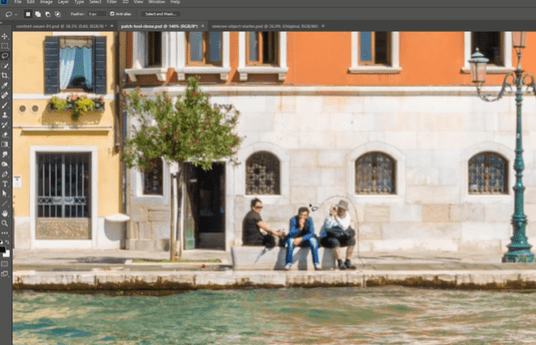
When I’m happy with the area, I can just release, and then press Ctrl D, Command D to deselect,and notice that Photoshop did a much better job. The reason that I didn’t select this side here, is that there’s a shadow from this lamp post, so I didn’t want to duplicate that.The edit wasn’t perfect, and it was mainly because I didn’t drop the selection in the right area.
So, I can try that again, let me click and drag, and just try to get a better closer match. So maybe something like that. Ctrl D, Command D to deselect, so that looks much better. The bricks align better. There are issues like this area here, but we could easily fix these issues by just using the patch tool on those specific areas.

Then I can double-click on the Hand tool to zoom out, and you can see the before, and the after.
Use Clone Stamp Tool for Remove object on Photoshop
Another tool that I want to show you before we move on into the more complicated example is the Clone Stamp Tool, which simply allows you to paint in duplicate pixels from another area. So, with that tool selected I’m going to zoom in and create a new layer to work nondestructively.
With this layer, I can make sure that current and below are selected, or all layers. It really doesn’t matter in this example, so I’ll leave it on current and below. Then, I can just select areas to copy pixels from.So if I wanted to remove this lamp post, I can start maybe in this corner here, and then use the bracket keys on the keyboard to increase the size of my brush, then I can try to align what I just copied, what I just sampled, this area here, and align it to the other window.
Then I can paint in those pixels like so. I know I’m getting a little of the shadow, but that’s okay. Next I can sample from a different area, maybe this area here, and line it as best as I can, and paint away the rest of the lamp like so.
I’m not going to spend too much time on this example because the example that I really want to show you is the one after this. But you can see how you can start painting things away nondestructively using the Clone Stamp Tool. This is basically what we did in just a couple minutes. Really quickly, we were able to remove that lamp post. There a couple details there that, again, we’re not going to spend the time on
Our Latest Blog
20+ Best 3 Point Slinger for Camera📷 in 2023
Artistic Yoga Photography | Yoga Photography Tips 2023
110+ Most Ugly Jewelry 💍 Images in The World
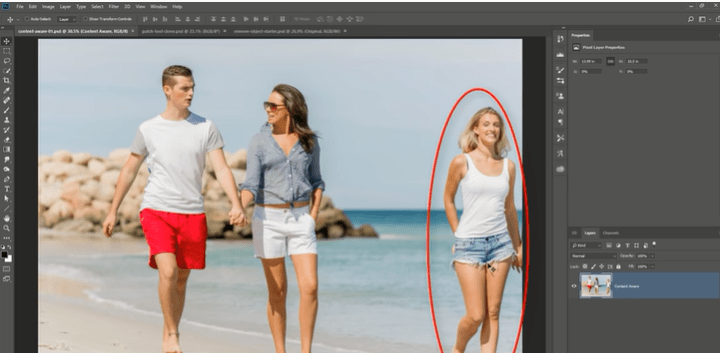
How to Remove Unwanted Object from Background
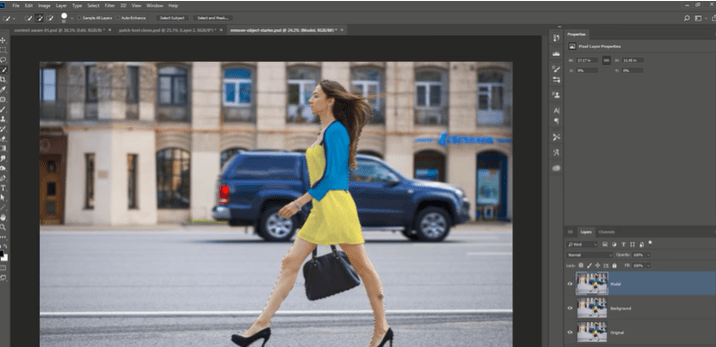
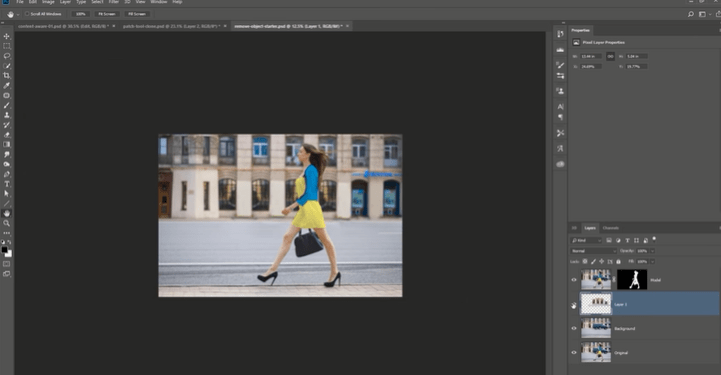
We’re going to work with this image here, and what we’re trying to do is Remove the Unwanted Object from the background. So, first of all, we want to work nondestructively, so I’m going to press Ctrl J, Command J on the Mac twice to duplicate the layer two times.
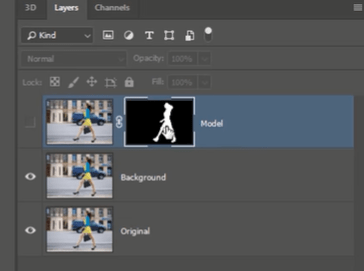
The layer on top will be the model and the layer below that will be the background. Just like with a lot of things in Photoshop, I like to separate my elements so that they’re easier to control. So, even though we’re going to work with a single image, we’re still going to use different layers to control different elements, and I think that makes it easier to work with. Now that we have these two layers set up, I’m going to select my model layer.
Use Selection Tool to Remove Unwanted Background on Image
Click on the quick selection tool for How to Remove an Object in Photoshop CS6. You can click and drag and make a selection around the model. If you’re working with photo editing Photoshop CC and newer, you can click on Select Subject while the quick selection tool is selected, and Photoshop will make a selection based on whatever it thinks the main subject is.
In this case, the model. Photoshop does a fairly good job. It’s not going to be perfect; you can click and drag to add to the selection, and you can also subtract from the selection by holding Alt Option on the Mac, and clicking on areas that shouldn’t be selected, like these areas there.
By the way, the selection doesn’t need to be perfect. As long as you mask out the areas near the distractive object, you should be fine. I’m going to zoom in and just make sure that it selected the bracelet, I didn’t miss one piece. But overall, it did a really good job. I’m going to create a Layer Mask, and now we have a layer that just contains the model. We’re going to create a layer that only contains the background.
Use Image Layer Mask on Photoshop
How to Remove an Object in Photoshop CS6: I’m going to use the model Layer Mask. So, I’m going to hold Ctrl, that’s Command on the Mac, and click on the Layer Mask thumbnail to load the Layer Mask as a selection.
Notice: my model layer is disabled, and I’m going to select the background layer. With the background layer selected.
I’m going to go into select, modify, and expand. This is going to make my mask larger. And I’m going to expand it by five pixels, but this may be different for you depending on the size of your photo. This is a fairly large image, so I’m using five pixels.
In some cases, you may need two, or maybe even three. So, we’ll go for five in this case. But the point is that now I have that space in between my subject and the background. With the background selected, I’m going to hold Shift and Backspace to bring up the Fill window.
Then under contents, I’m going to select Content-Aware, make sure the Color Adaptation is checked, and press OK.
Photoshop is going to remove the model from this photo. It’s not going to do a perfect job, but that’s okay. We’re going to continue building upon this background, to just create a clean background for our model.
Use Rectangular Marquee Tool on Photoshop
How to Remove an Object in Photoshop CS6- I’m just going to create a selection using the Rectangular Marquee Tool. Then I’m going to press Ctrl J, Command J on the Mac, to duplicate that. So now, I have this duplicate.
One thing that I should have mentioned, and I’ll undo that so you can see it, is that when I selected the Rectangular Marquee Tool, I had a feather of three pixels. That means that the edges will not be sharp, they’re going to be blurry, three pixels. I left that value on purpose because I don’t want sharp edges.
I want smooth edges, so when I copy something, and I paste it somewhere else, I won’t see that sharp edge. So, once again, Ctrl J, Command J to duplicate. I have that piece right there, and I’m going to move it over to this side. Now obviously, the colors don’t match, but we can fix that.
I can create a Levels Adjustment Layer, clip it to the layer below it so that the only thing the levels adjustment layer effects is the strip right below it.
Notice: if I make an adjustment, it only affects that strip.
I can click on the black point and drag it to the right until that matches luminance of that area. Then, with the Layer Mask selected, I can press Ctrl I, Command I on the Mac, to invert to make the Layer Mask black, which will hide the adjustment. Then, with the brush tool selected, you can paint with white to reveal the effect only in certain areas.
I’m sampling from that area, and then just cloning in pixels like so. I’m going to zoom out, and it looks like I missed one piece right here. When I do this type of work, usually I have my left hand on the Alt key, and I’m sampling from many different places and painting.
So that’s before and after.
Read More –
How to Use Transparent Images On Photoshop | Transparent Images
How to Get Refine Edge in Photoshop CC | Clipping Path Client Inc.
How Do You Make a Background Transparent | Remove Background
How to Make The Background White in Photoshop CS6 | White BG
How to Deselect in Photoshop | Step By Step | Clipping Path Client
How to Smooth Skin in Photoshop | Clipping Path Client