


How to Take Professional Product Photography for Online Store
How to Take Professional Product Photography for Online Store: It are often said that product photography is that the window into your business’s world. So that’s why it’s essential to possess images that aren’t only beautiful but also accurate representations of your products. this is often very true for online shops because people can’t touch or see your product in real world .
With improved camera technology cheaper lately , it’s possible for a beginner to realize some great quality product photography with a daily point and shoot camera and even together with your phone camera too!
How to Shoot E-Commerce Photography for Online store
E- Commerce photography, if it’s done correctly it can be quick and it can be an easy way to make money. but, there are a few tricks to getting it right now in the recent how-to Articles that We did with broncolor’s Urs Richer.

We showed you an effective lighting setup for shooting eCommerce fashion Or product but there’s much more to online sales than just fashion Or Products shot.
Why Product Photographers are some of the highest-earning photographers in the industry?
Now E-Commerce, although it’s a much simpler form of advertising photography. it’s still equally powerful in persuading consumers to buy but there are a few key details that we need to keep in mind when shooting. As always is-
01: Preparation
Now whether it be ironing clothes, cleaning and dusting a bottle of Wine, or thinking about the shots that you need or testing your lighting beforehand.
Preparation is key to any successful shoot. you can never be too prepared when it comes to photography so take your time with this part of the shoot some of the key things to do before the shoot include preparing.

Your items creating a shot list of your items and thinking about preparing your lighting now preparing your items could include a variety of things.
It largely depends on the items that you’re going to be shooting for example if you’re shooting clothes make sure the items are clean and ironed pay attention to details like loose threads or missing buttons these may seem like minor things.
Correcting them before shooting will save you a lot of hassle further down the line and a lot of post-production work further down the line. if you’re shooting pack shot products for example,a box of tea or it might be various different products make sure that the products sit well.
There’s no open edges on the shape of the boxes remember that many pack shots involve shooting boxes or cartons or items that are packaged. packaging sits is very important sometimes you actually need to take the cartons apart re-glue them or Blu-tack them in place or use double-sided tape.so, that they sit properly now one other thing that is really important with product shots for e-commerce is to organize all of your products.
Why the preparation part is so important you’re basically trying to create a production line of photography of images of objects. So, having those objects well prepared the cartons the boxes reflective items size of items and organizing yourself.
Really well first will help you rapidly shoot through those objects in a day and get more shots done be more productive and therefore, basically make more money from the shoot.
02: Equipment
E – Commerce requires very little in terms of equipment you can get away with little more than two or three lights and reflectors for your lighting and any half-decent DSLR or mirror less camera will be good for the job.
But, You will need a good tripod We recommend a good solid based tripod because you want that consistency you don’t want to accidentally tap your tripod on the whole tripod move.so, get yourself a really good decent weighted tripod.
The other useful accessories for e-commerce photography which you’ll see oars and I use in the Articles that We mentioned that are in another blog post on.
03: Lighting
There are many blog posts out there that advocate for natural light there is no doubt that studio lights will allow for far greater control and allow you to shoot at any time of day.
E-Commerce Photography typically features those clean white backgrounds with bright well lit products and it’s easier to accomplish this with studio lighting. it is with natural light now as We mentioned in the Articles we’ve got one Articles here.
We demonstrate with three studio lights that are flash studio lights.then we demonstrate another e-commerce shot which is three lights that are continuous LED lighting. so, your options are there and are available for you to consider which type of lighting will work best for you.
Photography Tips to Grow Your Online E Commerce Business.
How to Take Professional Product Photography for Online Store: In this Articles We Learn Step by Step Photography Tips for grow your E- Commerce Business.
Tips 01: Choose the proper Camera
Do you need a fashionable DSLR to require great quality pictures?
Today, you’ll escape with employing a high-quality smartphone camera.If you’re just starting out, or you’re only selling a couple of products, this could be an honest option for now.
But if you’re willing to place the time and energy into learning product photography,it might be worth investing during a DSLR camera.Yes, quality cameras are expensive, and therefore the learning curve is steep.But, you’ll change the settings and lenses counting on your needs.
Even at factory settings, the high resolution of a DSLR camera will allow you to point out then details of your products.
Tips 02: Take Two Type Product Photo
The first sort of product photo you’ll need may be a lifestyle photo.These photos show your product getting used in its intended environment.If you’ll use models that appear as if your audience , even better.For example, here’s a photograph of a jacket from Ball and Buck during a lifestyle shot.
The Second sort of product photo you would like is one with a white background.Here’s an equivalent product from Ball and Buck, but with a white background.This image is great because it’s simple, so it lets customers see the product’s details.
You can never have too many photos like this, as long as all of them showcase your product from different angles.
Tips 03: Create an Infinity Curve
how does one create that perfect white background at home?
You’ll need what’s called an infinity curve background.To create an infinity curve background, take an outsizes piece of white book or card, and bend it to make a curve, like during this photo from Sky Garden.
If you’ve got larger products, you’ll use a white sheet to make an equivalent effect.
Tips 04: Choose an excellent Background for Your Lifestyle Photos
A well-chosen background can do wonders to reinforce the looks of your products.When shooting lifestyle photos, confirm to settle on a background that’s according to your brand. during this image, rugged menswear company Taylor Stitch showcases their leather jacket during a suitably industrial-looking setting.
If you sell smaller products, you would possibly want to incorporate photos of your products on different surfaces, sort of a wooden table or marble counter tops. Watch Outfitters has done that here.Feel free to experiment, to seek out out what works best for your brand.
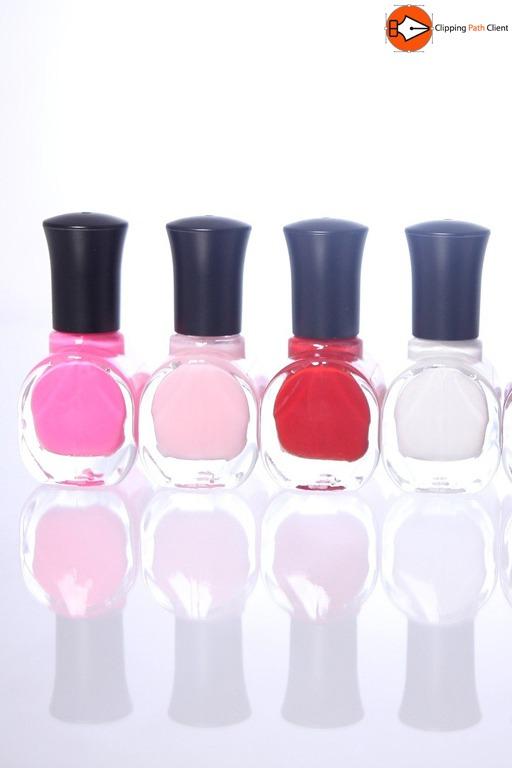
Tips 05: Take Photos of each Color and Variable.
Don’t just tell visitors that your product is out there in other colors — show them! Remember, customers want to ascertain the merchandise before they pip out .Bump does an excellent job of this on their site.
Make sure every unique product has its own set of images.
Tips 06: Use Natural Lighting
Use Natural Lighting Unless you’ll afford professional lighting equipment, and you’re willing to find out the way to use it effectively, it’s best to start out by using natural light.
How to Take Professional Product Photography for Online Store: Because, natural light is soft, providing you retain your product out of direct sunlight.Unlike hard light, soft lighting is diffused, and doesn’t create harsh shadows.
This is nearly always better for product photography.Also, avoid using quite one sort of light in a picture .For example, you don’t want to combine natural light with artificial light from a lamp.
Product Photography White Background in Photoshop At Home
Ah that white background in product photos… so frustratingly hard, right? Yet everyone on Instagram is making it look very easy.
It’s a glance tons folks attempt to achieve, but feels really difficult to urge right without blowing out the whole photo. So, Today We assumed We would show you an excellent quick easy thanks to get a white background in product photos.
Tips 01: Back Drop
The First thing that we need to consider is backdrop to get nice clean white background images. we’re gonna need a white backdrop. so, you’ll see this a lot in professional photo studios.
They’ll have maybe a flexed piece of perspex against the wall and for smaller products obviously. a smaller piece of perspex going to be shooting pretty small products today.
The Type of thing that you would be finding on say a jewelry website or Etsy for crafts and things like that this technique is gonna be perfect for getting white background shot of small products. that you might be selling out of your own home and this is absolutely something you can do at home.
We are only gonna use a sheet of white paper for my backdrop simply because, it’s available easily anywhere and it’s perfect for this type of thing. So, We are gonna set this up on my dining table nowhere special and we can take a look at exactly what that’s gonna look like So Our dining table.
We are gonna put our little sheets of paper and set it up with a nice little curve.We are gonna be propping it up against well stack of books and that way we can adjust the height of that curve just by adding or removing those books placing this all together with books in the background.
How to Take Professional Product Photography for Online Store: We are going to place our sheet paper just onto the top of the books and just hold them in place with something heavy. So, that the paper doesn’t slide away and you’ll see there. we now have control over how steep that curve is but honestly the paper just Falls quite nicely to be able to put our products down in the middle.
Tips 02: Placement
E-Commerce site or anything else that requires some product shots chances are you’re gonna be getting a lot of variety within those products.you’re gonna need to be taking hundreds of photos all really quickly.So, you’re not really wanting to change your setup around too much to cater for the different types of product, an analogue of all these different types of products.
We’ve got some different colors of shotgun shells We don’t have hundreds of have a big stock of products lying around.so, demonstrate to you but We are going to demonstrate using these.there’s all different colors they’ve got these shiny bases on them which is going to be a challenge for us to light.
We can cater for that as well and it’s just going to be a case of finding the right setup to get through these as quickly as possible with the variety of different products that we’ve got.
So, Where do we place these on our background so, to reduce your editing time you’re gonna want to get the product in the same place on your background every single time. so, that you don’t have to line up the pictures later on it can adds to the consistency when you’re taking lots of shots for say an e-commerce website.
We’ve done is make a tiny little mark just on the paper down and just at the other end where We are going to place our shell. So, We are just going to cover that mark ever so slightly with the back end of the shell and the the other mark is just sticking out the back where you’re not gonna be able to see it and that means that .We can then take a shot and very quickly change out the product for the next one and get it in a very very similar position.
Understanding the Photoshop Tools for Remove Background
There are many apps and online editors you’ll use to get rid of backgrounds, but most of them have some features in common. We’ll re-evaluate these so you recognize what to seem for regardless of which image editor you employ . In fact, knowledge of those common tools will make it easier for you to settle on an editing app that works best for you and your products.
The Magic Wand Tool
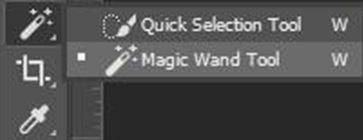
The most common thanks to remove a background during a product image is to pick it and delete it all directly , then use a more precise tool for touch ups in small areas. The tool wont to select the background can vary, but is most ordinarily the Magic Wand tool. Tools may have different names across programs, but add similar ways — for instance , if using GIMP, the Magic Wand tool is named the Fuzzy Select tool.
The Pen Tool
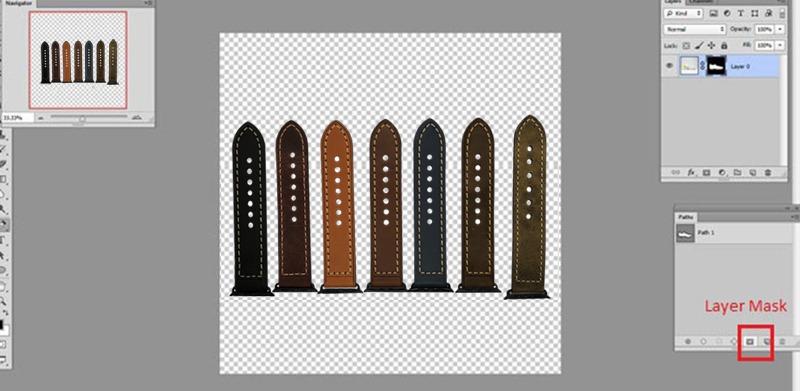
The Pen tool may be a feature of Photoshop. By Vangie Beal In graphics software, the pen tool is usually utilized in the creation of smooth-edged selections, but isn’t a kind of selection tool. Unlike the comb Tool and Pencil Tools, which “draw” pixels onto your image, the Pen Tool always creates a vector path when used. These paths appear as either Work Paths or Shape Paths within the Paths Panel.