


Jewelry Photography Editing Tips- The jewelry photography editing we saw on the website had a beautiful and luxurious look. But the picture does not look clear. From our seven years of experience in jewelry editing in the color clipping path, We can guarantee that only jewelry can create the best jewelry photos.
Jewelry retouching is the best solution for jewelry owners to stand out in the market. The industry relies heavily on visual cues. So, if you want your jewelry to stand out, make sure it is displayed in the best possible way.
How Jewelry Photography Editing Tips Is Going To Change Your Business Strategies
1. Setup for jewelry photography Preparation
The first thing you need to do is prepare the photo set for jewelry photography. Creating a perfect studio doesn’t cost a lot of money because your dedication and creativity are enough. So mix your creativity and passion and create a set that we hope will be great.
If you take pictures of the best fair, the images will become apparent and beautiful.
2. Use a tripod for jewelry photography
You can use a tripod for still photos, such as jewelry.
There are two other benefits to mounting a camera on a tripod:
-
Adjusts the focus point and depth of field (aperture);
-
You can lower the shutter speed and ISO to meager rates to block or reduce noise.For a lifestyle catalog like editorial photography, you can leave a tripod at home. Keep in mind that you still want to follow commercial photography guidelines and hone your work.
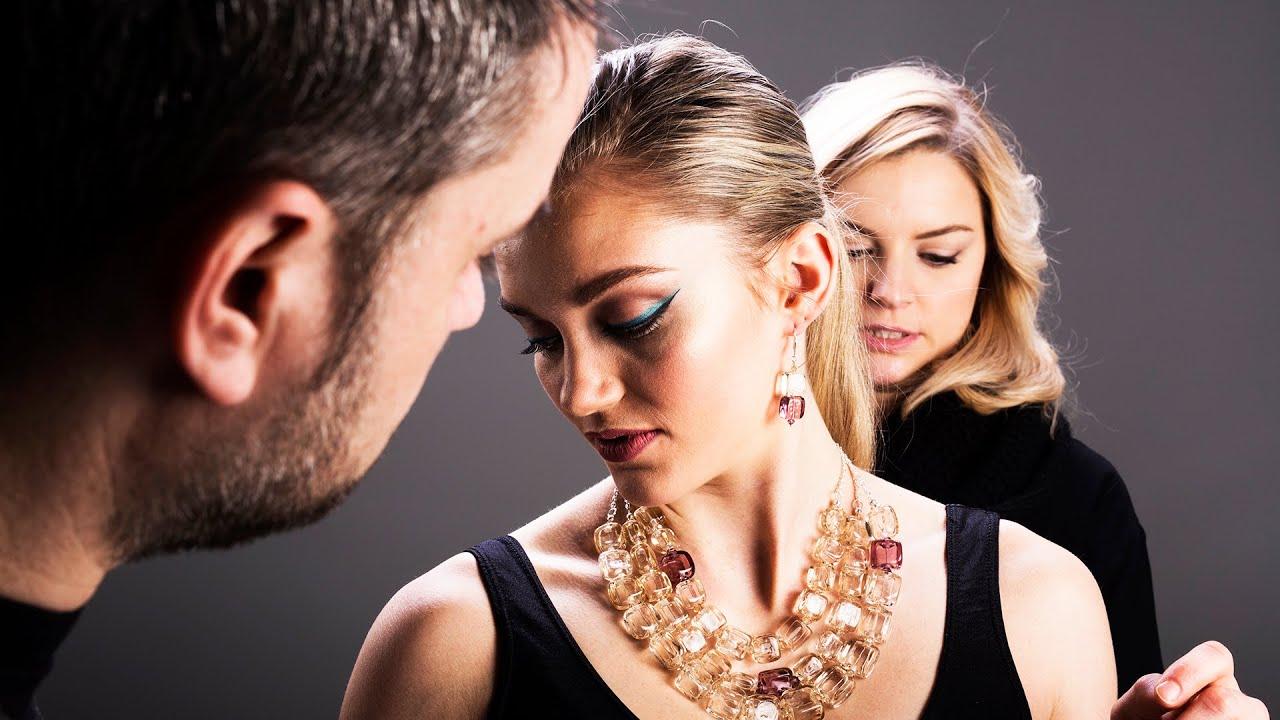
3. Working Model Jewelry Photography
Working with jewelry image models is the best way to express a product. When viewers see jewelry with any design, they can better understand how it fits. It might be a bit expensive for any photographer, but it will decorate jewelry excitingly and realistically.
Working with templates gives you more exposure and designs. In addition, your jewelry photo shooting skills will also improve.
4. Carefully Manage jewelry Reflections
Gems and metals are very reflective, so you can see yourself (and your camera) reflecting your jewelry, something you don’t want.
In the case of jewelry, removing shine is a trial and error process. As mentioned above, placing paper around the camera lens will help prevent glare and reflect more light into the subject.
No expensive adjustments are required. Use a diffused light from the top on each side to provide enough light without creating overly reflective stains, and lift the camera slightly (using a tripod) so that it can be carried somewhat toward your product.
5. jewelry photography Cardboard
Don’t you have a dummy? Make a variety of jewelry cutting boards for decorations. Take a piece of cardboard, cover it with white paper and glue it so that the ends of your tile stick to your back. You can adjust the length of the tile to your liking, so you don’t have to worry too much about the size if you cut it.
Using cardboard takes a little longer, but like using a dummy, it shows the shape of a natural chain and looks beautiful when you take a front photo.
6. Jewelry photography Blu-Tack, glue dots, or double-sided tape
When you take pictures of jewelry in a flat area, you can not always leave the product. Sometimes it is necessary to change the position of the stand and the decorative angle. But these items would not have survived without repairs, so the above materials began to be used.
Use blue loads, adhesive dots, and double-sided tape to attach the decorations to the surface. This way, the products look good and have new angles to take pictures. Using a string, you can arrange the ornaments in the center and then copy the image. This gives the furniture extraordinary decor.
After creating images, remove these blue stickers, adhesive dots, strings, and strips from the photo by editing them.
7. Clean the Jewelry
We are not cleaning jewelry before taking pictures – a mistake for a beginner.
Imperfections after processing can be difficult and frustrating. The jewelry is small and has excellent details.
Just remember what the rooms look like under the lights. Always carry a cleaning towel with you. When handling jewelry, wear gloves to avoid fingerprints.
8. Jewelry color corrections
It is mandatory to show the actual color of the jewelry ornament. Many users prefer an online store when viewing product images. If a consumer orders gold jewelry and, after receiving the product, notices that the color is silver, that is very unfortunate. Examine the conditions, focus on capturing the actual color of the image, then concentrate on illuminating the image.
You need to pay attention to this when editing the image. Standard images may look dull, so adjust the color there. But you need to edit the image and change the color, respecting the actual color of the jewelry.
9. Remove hard shadows in the photo
A prerequisite for e-commerce photography (such as eBay, Amazon, etc.) is that the product is taken on a smooth white background. If there are hard shadows, they will not get the final image.
Changing the shadow in post-processing can be a big deal! An easy way to solve this problem is to illuminate a shade-removing jewelry product.
FAQs Of Jewelry Photography Editing
What is the best way to take pictures of jewelry?
You must first follow the basic rules and acquire skills. Choose a camera based on your budget. When choosing a lens, you should always use macro lenses and primer to photograph decorations. Finally, use perfect or custom lighting and a tripod when taking photos.
Aperture focus, shutter speed, focus, detailed shots, and color correction are also important.
How do you fix jewelry in Photoshop?
In Photoshop, you can try different functions. You may not have time to change the image of the jewelry.
• Navigate to ‘Jewelry Image ->Adjustments ->Curves’
• Enhance the lighting exposure of the image by grabbing the line’s upper part
• Move the upper part more towards the top
What is the Jewelry Retouching?
Jewelry retouching is an important area in graphic design. Almost all businesses and online retailers do not have professional photographers who can take high-quality product photos.
That is why you need the help of an experienced graphic designer to process your product photo further. Photographing jewelry is complicated, and if you are unsuccessful, you may run into problems.
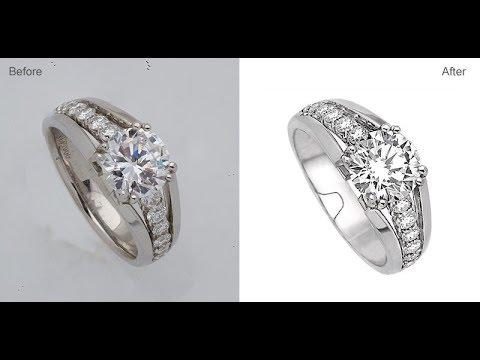
Editing Jewelry Photography Tips in Photoshop
The following steps will give you a precise idea of editing jewelry photography in Photoshop.
Step 1
• The jewelry images you want to edit must first be opened in Photoshop.
• Photos taken under standard lighting may appear blurry, out of focus, or less bright.
Step 2
• Go to “Image -> Edit”
• Enhance the light display of the image by capturing the top
• Move higher more
Step 3
• Flick click Lasso Polygonal tool (can also be used with other customization tools)
• Then place it on the background element to recover the device.
• Press Ctrl + J on the keyboard
Step 4
• Please create a new layer and fill it with the color of your choice
• Move this layer under the element you just cut
• Double click on it
• The background shade to be adjusted must go from white to light gray.
Step 5
• The destination must be selected again.
• If the hue is silver, then the saturation should be further reduced
• To get it, choose “Image -> Adjustment -> Saturation and Color”
Step 6
• Return to the Curves tab
• Move the curve up to illuminate the subject.
Step 7
• Go to “Filter -> Sharp -> Light Sharpen”
• Click on it to sharpen the image of the jewelry
• Filigree and other details become more apparent and enhance the look.
Step 8
• Create a new fresh level
• Go to the Brush tool, then select the shade of gray
• Make a point anywhere
• Go to the Edit menu -> Transform -> Grease to enlarge the brush
• Place a point under the image of the gem, then reduce its capacity
Editing Jewelry Photography Tips in Lightroom
Lightroom is not necessarily inferior to Photoshop. Just different. Photoshop is a pixel image editor. Your edits affect every pixel in the digital file. Lightroom is a global editor. He makes global adjustments, that is, in the whole picture. This is limited to editing certain parts of the image.
Now learn about How to editing jewelry photography tips on Lightroom.
The Histogram
It is essential to have a basic understanding of histograms. This way, you can change the lighting and tone of your photos.
Histograms measure the tonal range of an image. The brightness is engraved on a grayscale. Each pixel in the photo is evaluated.
Black on the left and white on the right. You can find gray tents in between.
The distribution of tones in the histogram will tell you about the overall exposure of the image.
Cropping
It’s a good idea to crop and align the image before making global adjustments.
First, make sure the image is straight.
I took a photo of my product with a rustic background, designed to imitate a picnic table.
This can be a complex background that can be described immediately. And it usually needs fixes in Lightroom.
Spot Removal
The dot removal tool will help you create a clean product image. You can use it at the end or the start of a workflow.
This removes all dust and minor defects that may appear on the sensor.
Click the Stain Remover tool to move it to where you want to remove the defect, and then click again.
It will take a close pixel and replace it.
Highlights and Shadows, Whites and Blacks
You can make many adjustments on this board before deciding on the final look. This gives you a more accurate tonal balance than relying solely on the Exposure slider.
Make bright areas look muddy, or shadows need more light. Move the slide to the point where the image as a whole looks good. You may need to readjust the exposure slider after making changes to this area.
In my product photos, the accents need a slight improvement. The shadows were also too bright for the look I was aiming for, which was dark and rustic.
Reduce accents and increase white. I also removed the black color to create the perfect balance for the aesthetic I wanted.